链路追踪-skywalking
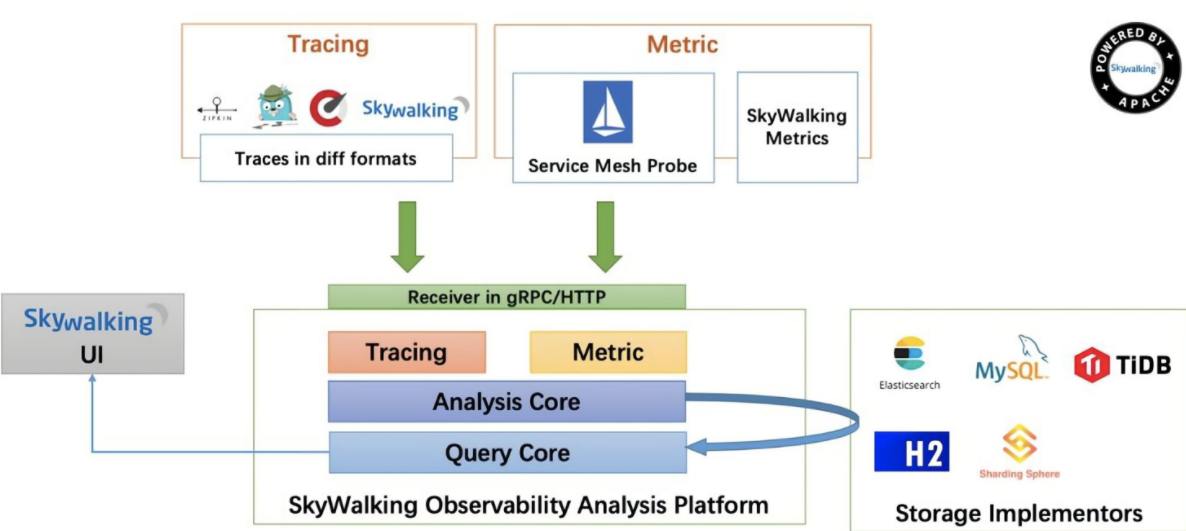
1)前期准备
1.1)ES准备(我这里单机部署)
下载解压
 root@ubuntu-2204:~# hostnamectl set-hostname es-single && bash
 root@es-single:~# wget https://artifacts.elastic.co/downloads/elasticsearch/elasticsearch-8.13.1-linux-x86_64.tar.gz
 root@es-single:~# tar xf elasticsearch-8.13.1-linux-x86_64.tar.gz -C /usr/local/
修改配置
root@es-single:~# ln -sv /usr/local/elasticsearch-8.13.1 /usr/local/elasticsearch
root@es-single:~# grep -v '#' /usr/local/elasticsearch/config/elasticsearch.yml
path.data: /data/es-data
path.logs: /data/es-logs
network.host: 192.168.139.250
http.port: 9200
xpack.security.enabled: false
xpack.security.enrollment.enabled: true
xpack.security.http.ssl:
enabled: true
keystore.path: certs/http.p12
xpack.security.transport.ssl:
enabled: true
verification_mode: certificate
keystore.path: certs/transport.p12
truststore.path: certs/transport.p12
cluster.initial_master_nodes: ["es-single"]
修改内存配
 root@es-single:~# echo 'vm.max_map_count=262144' >> /etc/sysctl.conf
 root@es-single:~# sysctl -p
 root@es-single:~# vim /usr/local/elasticsearch/config/jvm.options
 ...
 ## -Xms4g
 -Xms128m
 ## -Xmx4g
 -Xmx128m
 ...
创建用户
从es7.X以后版不允许以root启动服务,需要委创建专用的用户
root@es-single:~# useradd -r elasticsearch
目录权限更改
 root@es-single:~# mkdir -p /data/es-{data,logs}
 root@es-single:~# chown -R elasticsearch.elasticsearch /data/
 root@es-single:~# chown -R elasticsearch.elasticsearch /usr/local/elasticsearch/
启动 Elasticsearch服务
 root@es-single:~# echo 'PATH=/usr/local/elasticsearch/bin:$PATH' > /etc/profile.d/elasticsearch.sh
 root@es-single:~# . /etc/profile.d/elasticsearch.sh
 #不能以root用户运行,切换用户
 root@es-single:~# su - elasticsearch
 $ elasticsearch
验证服务
root@es-single:~# curl 192.168.139.250:9200
{
"name" : "ubuntu2204-4",
"cluster_name" : "elasticsearch",
"cluster_uuid" : "jEDgLL_YRhqITVsD6xFGzw",
"version" : {
"number" : "8.11.3",
"build_flavor" : "default",
"build_type" : "deb",
"build_hash" : "64cf052f3b56b1fd4449f5454cb88aca7e739d9a",
"build_date" : "2023-12-08T11:33:53.634979452Z",
"build_snapshot" : false,
"lucene_version" : "9.8.0",
"minimum_wire_compatibility_version" : "7.17.0",
"minimum_index_compatibility_version" : "7.0.0"
},
"tagline" : "You Know, for Search"
}
创建 service 文件
root@es-single:~# vim /lib/systemd/system/elasticsearch.service
[Unit]
Description=Elasticsearch
Documentation=http://www.elastic.co
Wants=network-online.target
After=network-online.target
[Service]
RuntimeDirectory=elasticsearch
PrivateTmp=true
Environment=PID_DIR=/var/run/elasticsearch
WorkingDirectory=/usr/local/elasticsearch
User=elasticsearch
Group=elasticsearch
ExecStart=/usr/local/elasticsearch/bin/elasticsearch -p ${PID_DIR}/elasticsearch.pid --quiet
# Specifies the maximum file descriptor number that can be opened by thisprocess
LimitNOFILE=65535
# Specifies the maximum number of processes
LimitNPROC=4096
# Specifies the maximum size of virtual memory
LimitAS=infinity
# Specifies the maximum file size
LimitFSIZE=infinity
# Disable timeout logic and wait until process is stopped
TimeoutStopSec=0
# SIGTERM signal is used to stop the Java process
KillSignal=SIGTERM
# Send the signal only to the JVM rather than its control group
KillMode=process
# Java process is never killed
SendSIGKILL=no
# When a JVM receives a SIGTERM signal it exits with code 143
SuccessExitStatus=143
[Install]
WantedBy=multi-user.target
root@es-single:~# systemctl daemon-reload
root@es-single:~# systemctl enable --now elasticsearch.service
Created symlink /etc/systemd/system/multi-user.target.wants/elasticsearch.service → /lib/systemd/system/elasticsearch.service.
root@es-single:~# systemctl status elasticsearch.service
root@es-single:~# curl 192.168.139.241:9200
{
"name" : "es-single",
"cluster_name" : "elasticsearch",
"cluster_uuid" : "t_n9Lvl0SVuqyS4jtopGng",
"version" : {
"number" : "8.13.1",
"build_flavor" : "default",
"build_type" : "tar",
"build_hash" : "9287f29bba5e270bd51d557b8daccb7d118ba247",
"build_date" : "2024-03-29T10:05:29.787251984Z",
"build_snapshot" : false,
"lucene_version" : "9.10.0",
"minimum_wire_compatibility_version" : "7.17.0",
"minimum_index_compatibility_version" : "7.0.0"
},
"tagline" : "You Know, for Search"
}
1.2)skywalking准备
1.2.1)二进制安装skywalking
安装skywalking
 root@skywalking:~# apt install openjdk-11-jdk
 root@skywalking:~# mkdir /apps
 root@skywalking:~# cd /apps/ &&  wget https://dlcdn.apache.org/skywalking/10.1.0/apache-skywalking-apm-10.1.0.tar.gz
 root@skywalking:/apps# tar xf apache-skywalking-apm-10.1.0.tar.gz
 root@skywalking:/apps# ln -sv /apps/apache-skywalking-apm-bin /apps/skywalking
 root@skywalking:/apps# cd skywalking/config
 root@skywalking:/apps/skywalking/config# vim application.yml
 ....
 storage:
   selector: ${SW_STORAGE:elasticsearch}  # 启用 elasticsearch 存储(按需修改)
   elasticsearch:
     namespace: ${SW_NAMESPACE:""}
     clusterNodes: ${SW_STORAGE_ES_CLUSTER_NODES:192.168.139.250:9200} # 填写对应的ES地址
 ....
创建启动文件
root@skywalking:/apps# vim /etc/systemd/system/skywalking.service
[Unit]
Description=Apache Skywalking
After=network.target
[Service]
Type=oneshot
User=root
WorkingDirectory=/apps/skywalking/bin/
ExecStart=/bin/bash /apps/skywalking/bin/startup.sh
RemainAfterExit=yes
RestartSec=5
[Install]
WantedBy=multi-user.target
root@skywalking:/apps# systemctl start skywalking.service
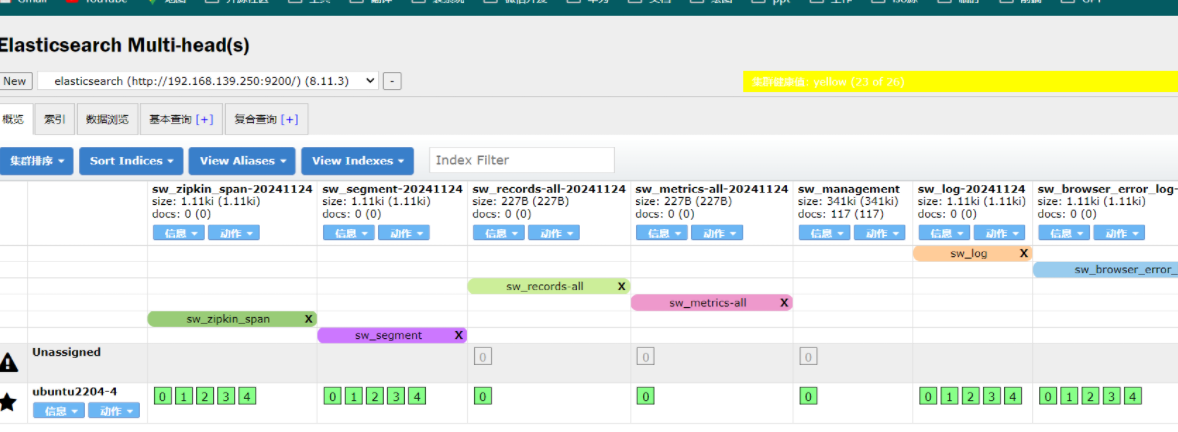
查看ES是否有数据存放
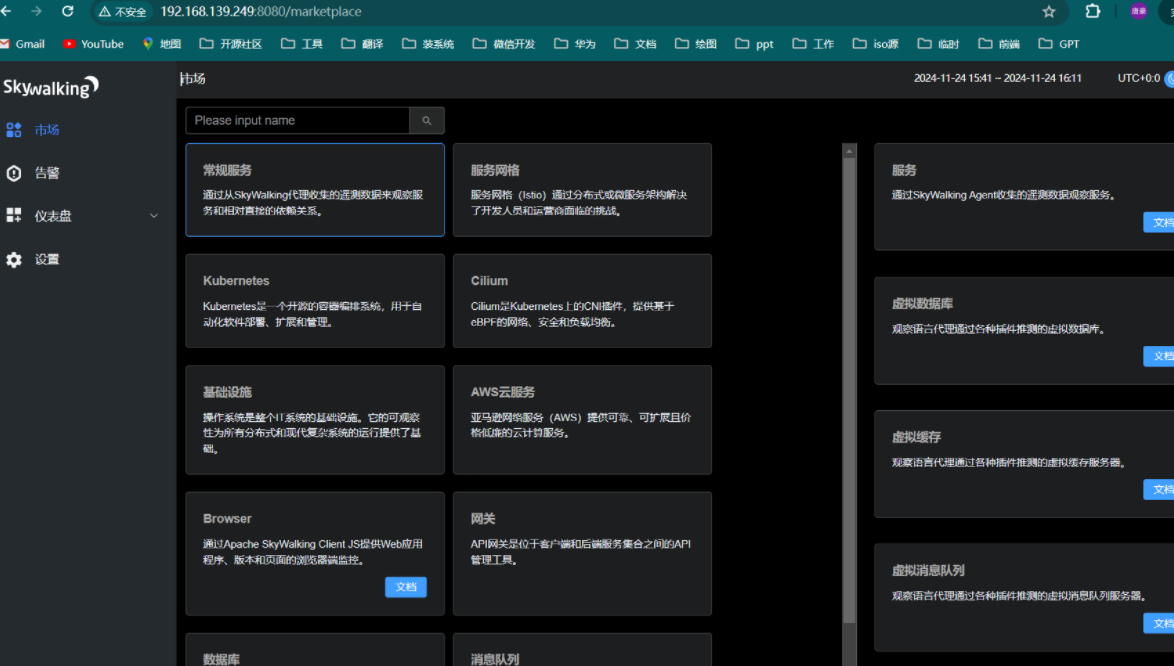
访问 skywalking UI端
1.2.2)docker-compose安装skywalking
编写yaml文件
root@skywalking:~# mkdir -pv /data/elasticsearch/
root@skywalking:~# chown 1000.1000 -R /data/elasticsearch
root@skywalking:~# mkdir /data/skywalking-9.3-docker-composefile -pv
root@skywalking:/data/skywalking-9.3-docker-composefile# cat docker-compose.yml
version: "3"
services:
elasticsearch:
image: elasticsearch:8.4.2
container_name: elasticsearch
ports:
- "9200:9200"
healthcheck:
test: ["CMD-SHELL", "curl -sf http://localhost:9200/_cluster/health || exit 1"] #⼼跳检测,成功之后不再执⾏后⾯的退出
interval: 60s #⼼跳检测间隔周期
timeout: 10s
retries: 3
start_period: 60s #⾸次检测延迟时间
environment:
discovery.type: single-node #单节点模式
ingest.geoip.downloader.enabled: "false"
bootstrap.memory_lock: "true"
ES_JAVA_OPTS: "-Xms512m -Xmx512m"
TZ: "Asia/Shanghai"
xpack.security.enabled: "false" #单机模式
ulimits:
memlock:
soft: -1
hard: -1
skywalking-oap:
image: apache/skywalking-oap-server:9.3.0
container_name: skywalking-oap
depends_on:
elasticsearch:
condition: service_healthy
links:
- elasticsearch
environment:
SW_HEALTH_CHECKER: default
SW_STORAGE: elasticsearch
SW_STORAGE_ES_CLUSTER_NODES: elasticsearch:9200
JAVA_OPTS: "-Xms2048m -Xmx2048m"
TZ: Asia/Shanghai
SW_TELEMETRY: prometheus
healthcheck:
test: ["CMD-SHELL", "/skywalking/bin/swctl ch"]
interval: 30s
timeout: 10s
retries: 3
start_period: 10s
restart: on-failure
ports:
- "11800:11800"
- "12800:12800"
skywalking-ui:
image: apache/skywalking-ui:9.3.0
depends_on:
skywalking-oap:
condition: service_healthy
links:
- skywalking-oap
ports:
- "8080:8080"
environment:
SW_OAP_ADDRESS: http://skywalking-oap:12800
SW_HEALTH_CHECKER: default
TZ: Asia/Shanghai
healthcheck:
test: ["CMD-SHELL", "curl -sf http://localhost:8080 || exit 1"] #⼼跳检测,成功之后不再执⾏后⾯的退出
interval: 60s #⼼跳检测间隔周期
timeout: 10s
retries: 3
start_period: 60s #⾸次检测延迟时间
启动服务
root@skywalking:/data/skywalking-9.3-docker-composefile# docker-compose up -d
2)使用案例
2.1)博客追踪案例(单体java服务)
下载博客系统java包和 skywalking-java-agent
 `下载博客`
 # apt install openjdk-11-jdk
 # mkdir /apps && cd /apps
 /apps# wget https://dl.halo.run/release/halo-1.6.1.jar
 `下载skywalking-java-agent`
 # mkdir /data && cd /data
 /data# wget https://archive.apache.org/dist/skywalking/java-agent/9.0.0/apache-skywalking-java-agent-9.0.0.tgz
 /data# tar xf apache-skywalking-java-agent-9.0.0.tgz
修改skywalking-java-agent配置
/data# vim skywalking-agent/config/agent.config
....
# The group name is optional only.
agent.service_name=${SW_AGENT_NAME:java-blogs} # 服务名称(可以随便命名,方便查找)
# The agent namespace
agent.namespace=${SW_AGENT_NAMESPACE:stj} # 项目名称(可以随便命名,方便查找)
.....
# Backend service addresses.
collector.backend_service=${SW_AGENT_COLLECTOR_BACKEND_SERVICES:192.168.139.249:11800} # 填写skywalking的server端地址
····
启动服务
                                         skywalking-agent的jar包                              博客系统jar包
 # java -javaagent:/data/skywalking-agent/skywalking-agent.jar -jar /apps/halo-1.6.1.jar
 ....
  [/BOOT-INF/classes/templates/themes] to [/root/.halo/templates/themes/caicai_anatole]
 2024-11-24 09:32:25.493  INFO 58572 --- [           main] run.halo.app.listener.StartedListener    : Halo started at         http://127.0.0.1:8090
 2024-11-24 09:32:25.493  INFO 58572 --- [           main] run.halo.app.listener.StartedListener    : Halo admin started at   http://127.0.0.1:8090/admin
 2024-11-24 09:32:25.493  INFO 58572 --- [           main] run.halo.app.listener.StartedListener    : Halo has started successfully!
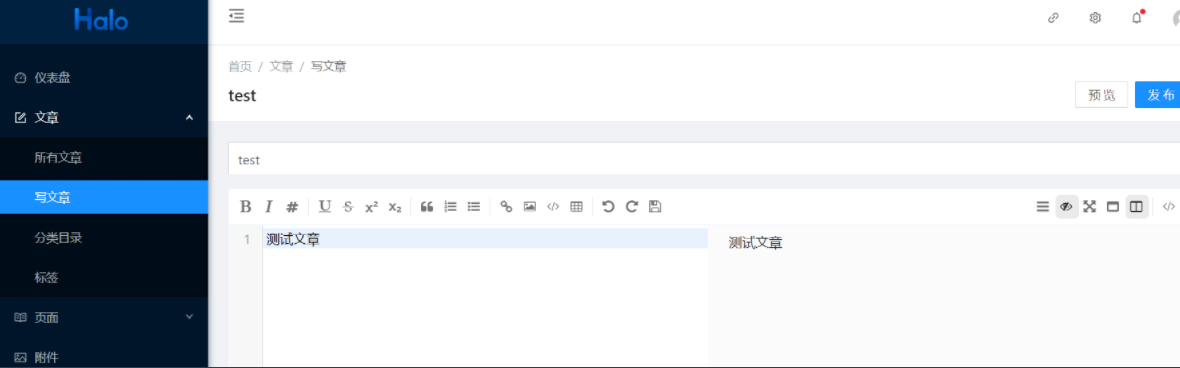
博客访问测试
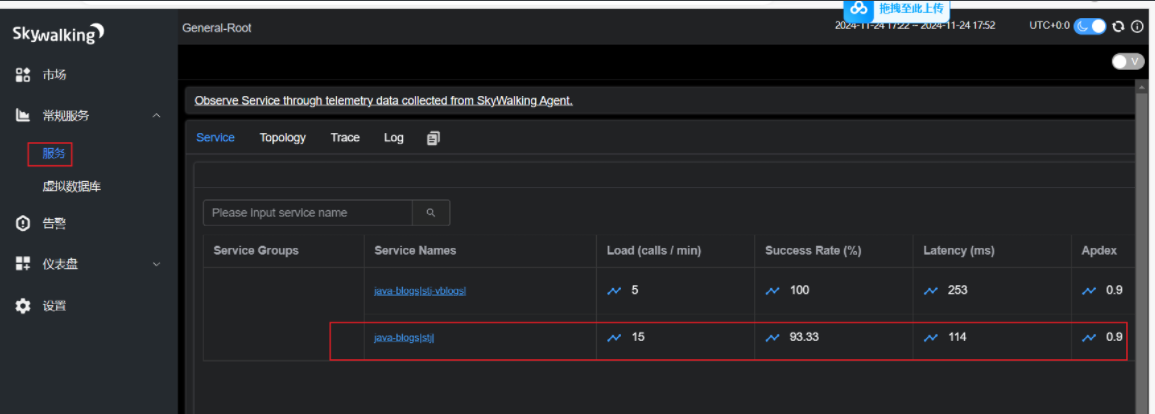
skywalking追踪请求查看
2.2)给予openresty的skywalking链路追踪
安装openresty
 # apt update && apt install iproute2  ntpdate  tcpdump telnet traceroute nfs-kernel-servernfs-common  lrzsz tree  openssl libssl-dev libpcre3 libpcre3-dev zlib1g-devntpdate tcpdump  gcc openssh-server iotop unzip zip make
 # wget https://openresty.org/download/openresty-1.21.4.1.tar.gz
 # tar xvf openresty-1.21.4.1.tar.gz  -C /usr/local/
 # cd /usr/local/openresty-1.21.4.1
 /usr/local/openresty-1.21.4.1# ./configure --prefix=/apps/openresty --with-luajit --with-pcre --with-http_iconv_module --with-http_realip_module --with-http_sub_module --with-http_stub_status_module --with-stream --with-stream_ssl_module
 /usr/local/openresty-1.21.4.1# make && make install
 /usr/local/openresty-1.21.4.1# /apps/openresty/bin/openresty -t
 nginx: the configuration file /apps/openresty/nginx/conf/nginx.conf syntax is ok
 nginx: configuration file /apps/openresty/nginx/conf/nginx.conf test is successful
配置skywalking nginx agent
# mkdir /data/ && cd /data/
/data# wget https://github.com/apache/skywalking-nginx-lua/archive/refs/tags/v1.0.0.tar.gz
/data# tar xf skywalking-nginx-lua-1.0.0.tar.gz
/data# cd /apps/openresty/nginx/conf/
/apps/openresty/nginx/conf# vim nginx.conf
..
include /apps/openresty/nginx/conf/conf.d/*.conf;
..
/apps/openresty/nginx/conf# mkdir conf.d/ && vim conf.d/myserver.conf
lua_package_path "/data/skywalking-nginx-lua-1.0.0/lib/?.lua;;";
# Buffer represents the register inform and the queue of the finished segment
lua_shared_dict tracing_buffer 100m;
# Init is the timer setter and keeper
# Setup an infinite loop timer to do register and trace report.
init_worker_by_lua_block {
local metadata_buffer = ngx.shared.tracing_buffer
metadata_buffer:set('serviceName', 'myserver-nginx') ---#在skywalking 显示的当前server 名称,用于区分事件是有哪个服务产生的
-- Instance means the number of Nginx deloyment, does not mean the worker instances
metadata_buffer:set('serviceInstanceName', 'myserver-nginx-node1') ---#当前示例名称,用户事件是在那台服务器产生的
-- type 'boolean', mark the entrySpan include host/domain
metadata_buffer:set('includeHostInEntrySpan', false) ---#在span信息中包含主机信息
-- set randomseed
require("skywalking.util").set_randomseed()
require("skywalking.client"):startBackendTimer("http://192.168.139.249:12800") ---# 填写对应的skywalking地址
-- Any time you want to stop reporting metrics, call `destroyBackendTimer`
-- require("skywalking.client"):destroyBackendTimer()
-- If there is a bug of this `tablepool` implementation, we can
-- disable it in this way
-- require("skywalking.util").disable_tablepool()
skywalking_tracer = require("skywalking.tracer")
}
server {
listen 80;
server_name www.myserver.com;
location / {
root html;
index index.html index.htm;
#手动配置的一个上游服务名称或DNS名称,在skywalking会显示此名称
rewrite_by_lua_block {
------------------------------------------------------
-- NOTICE, this should be changed manually
-- This variable represents the upstream logic address
-- Please set them as service logic name or DNS name
--
-- Currently, we can not have the upstream real network address
------------------------------------------------------
skywalking_tracer:start("www.myserver.com")
-- If you want correlation custom data to the downstream service
-- skywalking_tracer:start("upstream service", {custom = "custom_value"})
}
#用于修改响应内容(注入JS)
body_filter_by_lua_block {
if ngx.arg[2] then
skywalking_tracer:finish()
end
}
#记录日志
log_by_lua_block {
skywalking_tracer:prepareForReport()
}
}
location /myserver {
default_type text/html;
rewrite_by_lua_block {
------------------------------------------------------
-- NOTICE, this should be changed manually
-- This variable represents the upstream logic address
-- Please set them as service logic name or DNS name
--
-- Currently, we can not have the upstream real network address
------------------------------------------------------
skywalking_tracer:start("www.myserver.com")
-- If you want correlation custom data to the downstream service
-- skywalking_tracer:start("upstream service", {custom = "custom_value"})
}
proxy_pass http://192.168.139.249:8080;
body_filter_by_lua_block {
if ngx.arg[2] then
skywalking_tracer:finish()
end
}
log_by_lua_block {
skywalking_tracer:prepareForReport()
}
}
location /hello {
default_type text/html;
rewrite_by_lua_block {
------------------------------------------------------
-- NOTICE, this should be changed manually
-- This variable represents the upstream logic address
-- Please set them as service logic name or DNS name
--
-- Currently, we can not have the upstream real network address
------------------------------------------------------
skywalking_tracer:start("www.myserver.com")
-- If you want correlation custom data to the downstream service
-- skywalking_tracer:start("upstream service", {custom = "custom_value"})
}
proxy_pass http://192.168.139.250;
body_filter_by_lua_block {
if ngx.arg[2] then
skywalking_tracer:finish()
end
}
log_by_lua_block {
skywalking_tracer:prepareForReport()
}
}
}
主要是修改lua_package_path参数,也就是引用的lua文件路径和访问skywalking后端服务的端口号
启动验证访问
 /apps/openresty/bin# ./openresty -t
 nginx: the configuration file /apps/openresty/nginx/conf/nginx.conf syntax is ok
 nginx: configuration file /apps/openresty/nginx/conf/nginx.conf test is successful
 /apps/openresty/bin# ./openresty && ./openresty -s reload

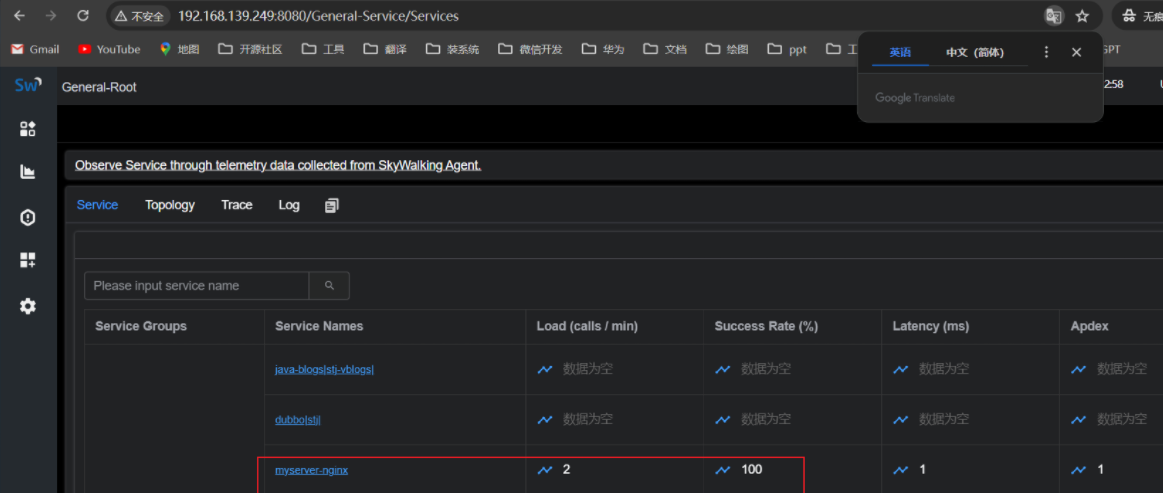
skywalking追踪请求查看

文章评论